




How to prevent annular cutter slipping with the Magnetic drill VD50
An annular cutter usually slips for one of four reasons: the magnetic drill is not sitting rigidly on the workpiece, the cutter is not fully secured in the arbor, the pilot pin is not working correctly, or the feed force becomes uneven. On the Magnetic drill VD50, correcting these basics matters more than forcing the drill harder. A stable setup keeps the cutter centered, protects the teeth, and produces a clean hole instead of an oversized or damaged opening.
Do not continue drilling once the cutter begins to rotate without cutting, chatter heavily, or leave a polished circular mark on the steel. Stop the machine, let the tool come to rest, and find the source of movement. Continuing can damage the cutter shank, arbor, workpiece surface, and magnetic base contact area.
Start with a secure magnetic base
The magnetic base must hold the drill against clean, flat ferrous material. Paint, rust scale, weld spatter, chips, oil, and uneven surfaces reduce magnetic contact. Even when the drill appears attached, a thin layer of debris can allow vibration under load. That vibration is often mistaken for a cutter problem.
Before positioning the VD50, wipe both the bottom of the magnetic base and the drilling area. Remove loose scale with a suitable hand tool. Place the drill where the base has full contact, rather than bridging a weld bead, slot, edge, or curved surface. If the material is thin, uneven, non-magnetic, or positioned overhead or vertically, use the appropriate mechanical restraint and safety chain in addition to the magnet. The magnetic base is not a substitute for proper workholding.
Check that the workpiece itself cannot move. A steel plate may be magnetic, but if it is loosely supported or able to flex, the drill and cutter can still shift as the teeth enter the material. Clamp smaller workpieces securely to a stable bench or support structure before drilling.
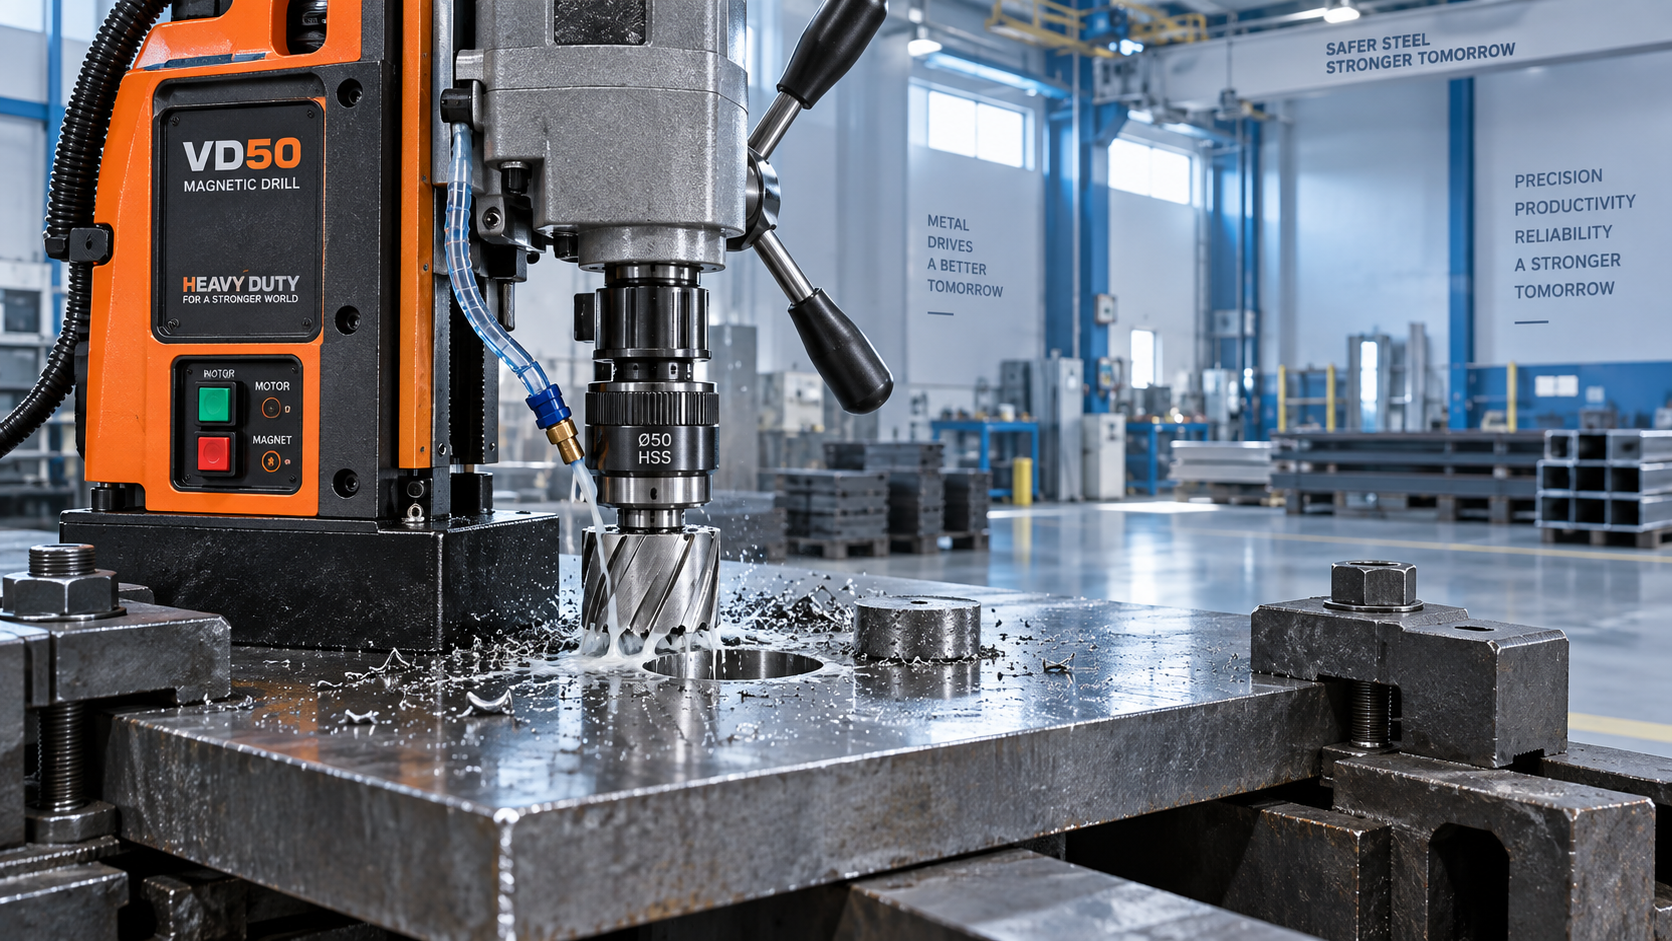
Make sure the annular cutter is seated correctly
A cutter can slip inside the arbor even if it looks installed. Remove the cutter and inspect the shank. It should be clean, free from burrs, and compatible with the arbor style used on the magnetic drill. Dirt in the shank flats, damaged set-screw contact points, or an incorrect shank type prevents the screws from locking the cutter properly.
Insert the annular cutter fully into the arbor with the pilot pin in place. Align any locating flats with the retaining screws where applicable, then tighten the screws evenly and firmly using the correct key. Do not tighten one screw while the cutter is sitting at an angle; this can hold it temporarily but allow it to shift as soon as drilling pressure increases.
After tightening, pull the cutter gently by hand with the machine switched off. It should not rock, rotate, or slide. Also inspect the arbor and spindle connection. If the arbor itself has play, replacing only the cutter will not solve the problem.
Do not overlook the pilot pin
The pilot pin does more than mark the center. It helps guide the cutter during the first contact with the steel and supports coolant delivery on many annular drilling systems. A bent, worn, sticking, or incorrect-length pin can let the cutter wander before the teeth establish a cutting path.
Press the pin by hand before fitting the cutter. It should move smoothly and return freely. Clean away metal fines around the pin bore. If it binds, address that issue before drilling; forcing the feed handle will increase side loading and make slipping more likely.
Use feed pressure that lets the teeth cut
Annular cutters are designed to remove a ring of material efficiently. They need steady, controlled feed pressure. A common mistake is beginning with excessive force because the operator expects the cutter to behave like a twist drill. Too much force at entry can make one side of the cutter bite first, creating chatter and pulling the drill sideways. Too little force can cause rubbing instead of cutting, which generates heat and dulls the teeth.
Begin with moderate, even pressure until the cutter forms a stable circular groove. Once the teeth are engaged uniformly, continue with a consistent feed. Watch the chips rather than relying only on sound. Proper cutting produces chips; rubbing produces heat, discoloration, squealing, and fine dust-like debris.
Near breakthrough, reduce feed pressure. The remaining material becomes less stable and the slug can release suddenly. A controlled finish protects both the cutter and the workpiece edge.
Match the cutter condition to the material
A worn annular cutter is more likely to skid across the surface or grab unevenly. Inspect the cutting teeth before each important hole. Chipped teeth, rounded edges, heat discoloration, or packed debris between teeth are signs that the cutter may no longer cut predictably. Reusing a damaged cutter can turn a simple drilling issue into a damaged arbor or inaccurate hole.
Use a cutter intended for the material being drilled. Mild steel, stainless steel, coated steel, and hardened material do not respond the same way to heat and cutting pressure. The correct approach is not simply to apply more force. Material hardness, thickness, cutter coating, cutting fluid, and machine speed must work together. Follow the cutter and drill manufacturer’s operating guidance for the tool and material combination in use.
Cutting fluid is especially useful when heat is building or when drilling more demanding materials. It reduces friction at the cutting edge and helps prevent chips from welding to the teeth. Keep the coolant path clear, and avoid allowing chips to accumulate around the cutter during the cycle.
Check alignment before blaming the drill
When a hole is close to an edge, beside a weld, or on a narrow flange, the cutter may not have enough supported surface to start evenly. The magnet may hold, yet the cutting action can still pull the tool toward the unsupported side. In these situations, reconsider the drilling method, use suitable backing or support where practical, or move the hole location if the design allows.
Drilling on curved pipe or irregular fabricated steel requires dedicated support and a setup that keeps the magnetic drill perpendicular to the intended hole. A standard flat-base arrangement should not be treated as automatically suitable for curved stock. The same caution applies to stacked plates: if the layers can separate or vibrate, the cutter may snag and lose its line.
For jobs that combine holemaking with faces, grooves, threads, or other precision features, it can be more efficient to move the work to a rigid machine tool after the portable drilling operation. In mechanical manufacturing, mold processing, and aerospace-related work, a conventional machine such as the Milling Machine X5040 may be a better fit when full workpiece clamping and controlled multi-operation machining are required. A magnetic drill remains most useful where the workpiece is too large, fixed in place, or impractical to bring to a machine table.
A short pre-drilling routine prevents most slipping
- Confirm that the workpiece is ferrous, stable, and supported against flexing.
- Clean the magnetic base and the drilling surface until both are free of chips, scale, oil, and loose coating.
- Fit a clean, undamaged cutter and a freely moving pilot pin; tighten the arbor retention correctly.
- Position the drill square to the surface and verify that the magnetic base has full contact.
- Use cutting fluid where appropriate and begin the cut with controlled, even pressure.
- Pause immediately if the drill shifts, the cutter chatters, or cutting turns into rubbing.
The most useful habit is to treat cutter slipping as a setup signal, not as a reason to push harder. A correctly mounted cutter, a rigid magnetic base, reliable workholding, and steady feed pressure allow the VD50 to cut with far less vibration and far better hole control. When the same problem repeats after these checks, inspect the arbor, retaining screws, pilot system, and cutter condition as a group rather than replacing parts at random.
